Quick overview
This page contains a short text-based overview of how to use the plugin, the basic concepts that will help users to use Builderius more efficiently.
Creating template
Create a new template
Immediately after plugin activation we are ready to create our first template. Templates are the main bricks of the site builder.
In order to create a new template we go to Templates page (1), then click on "Add new" button (2).
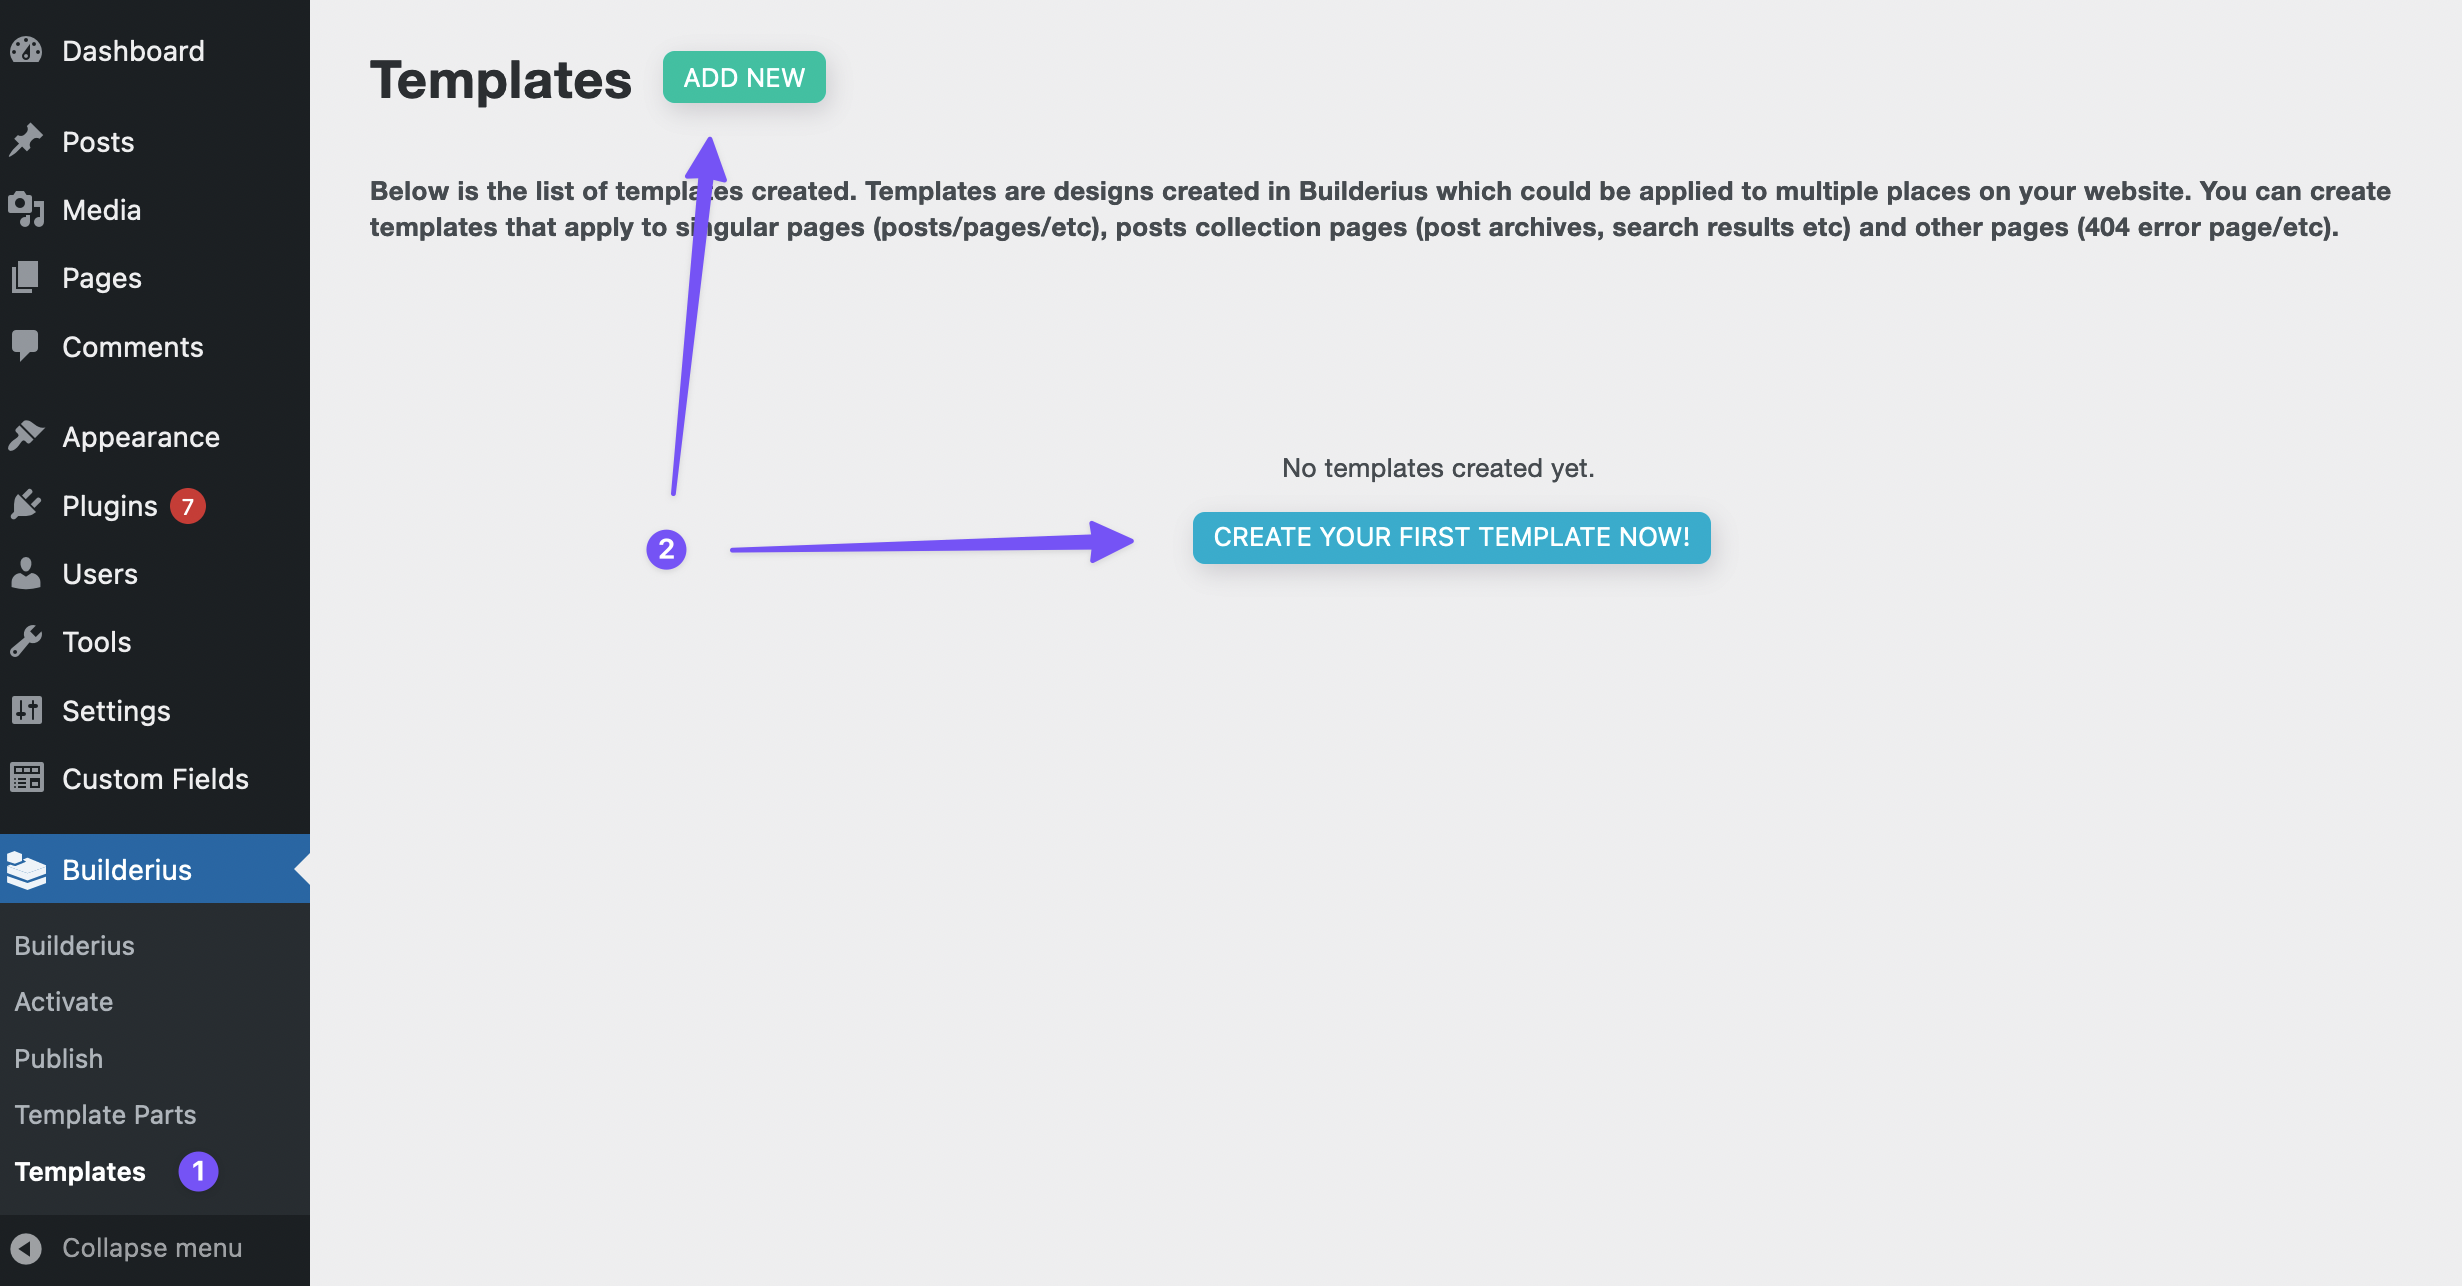
This will open a modal window with a two step form wizard:
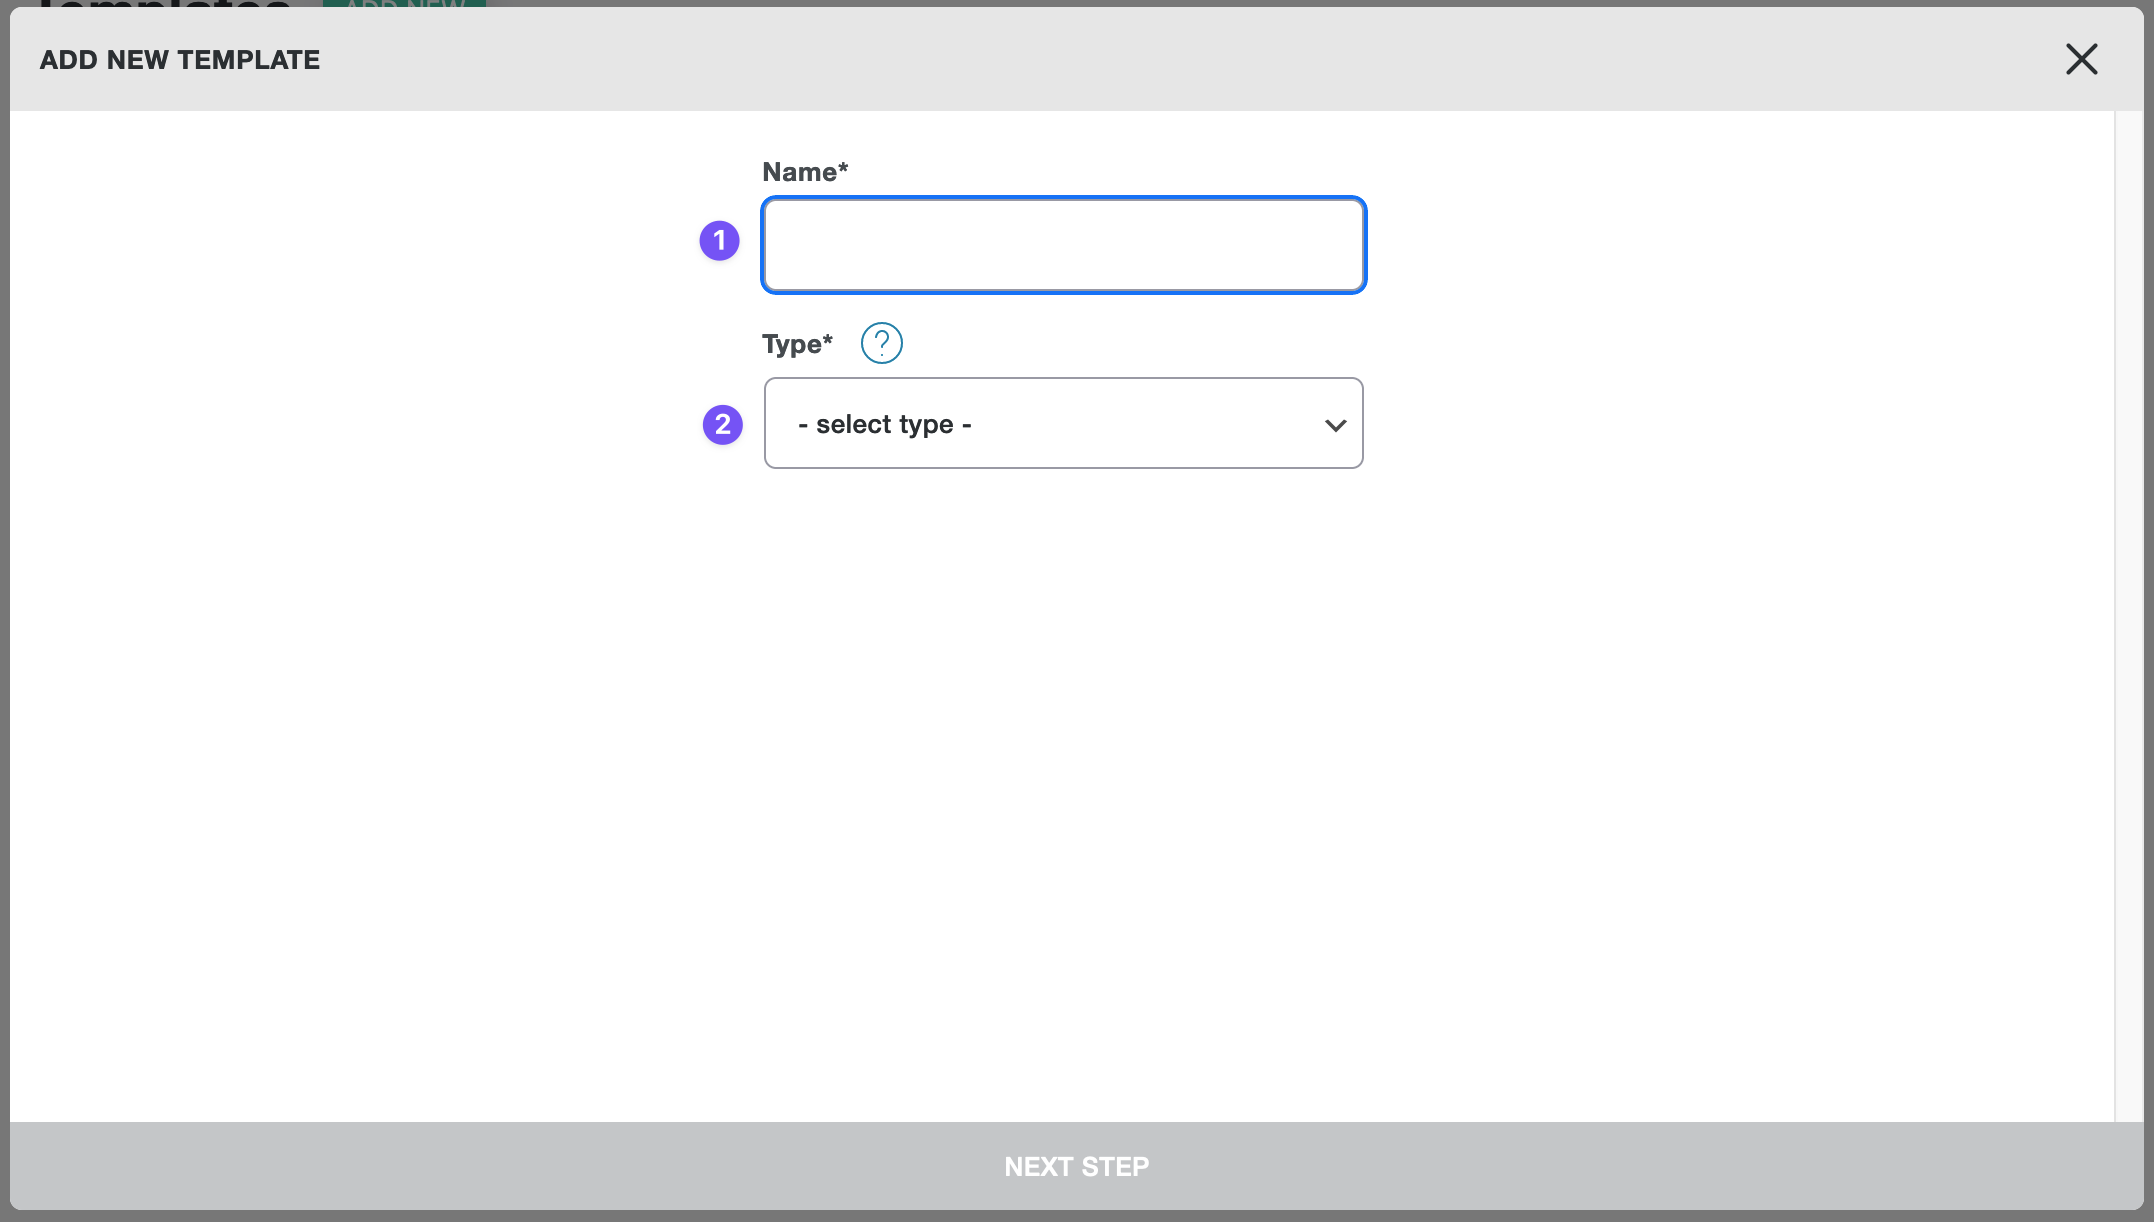
- Add a name
- Choose a desired type of the new template
In Builderius FREE there is only one type: singular In Builderius PRO there are two additional types: Collection and Other
The next step is dedicated to Apply rules - the conditions for displaying the template for specific pages:
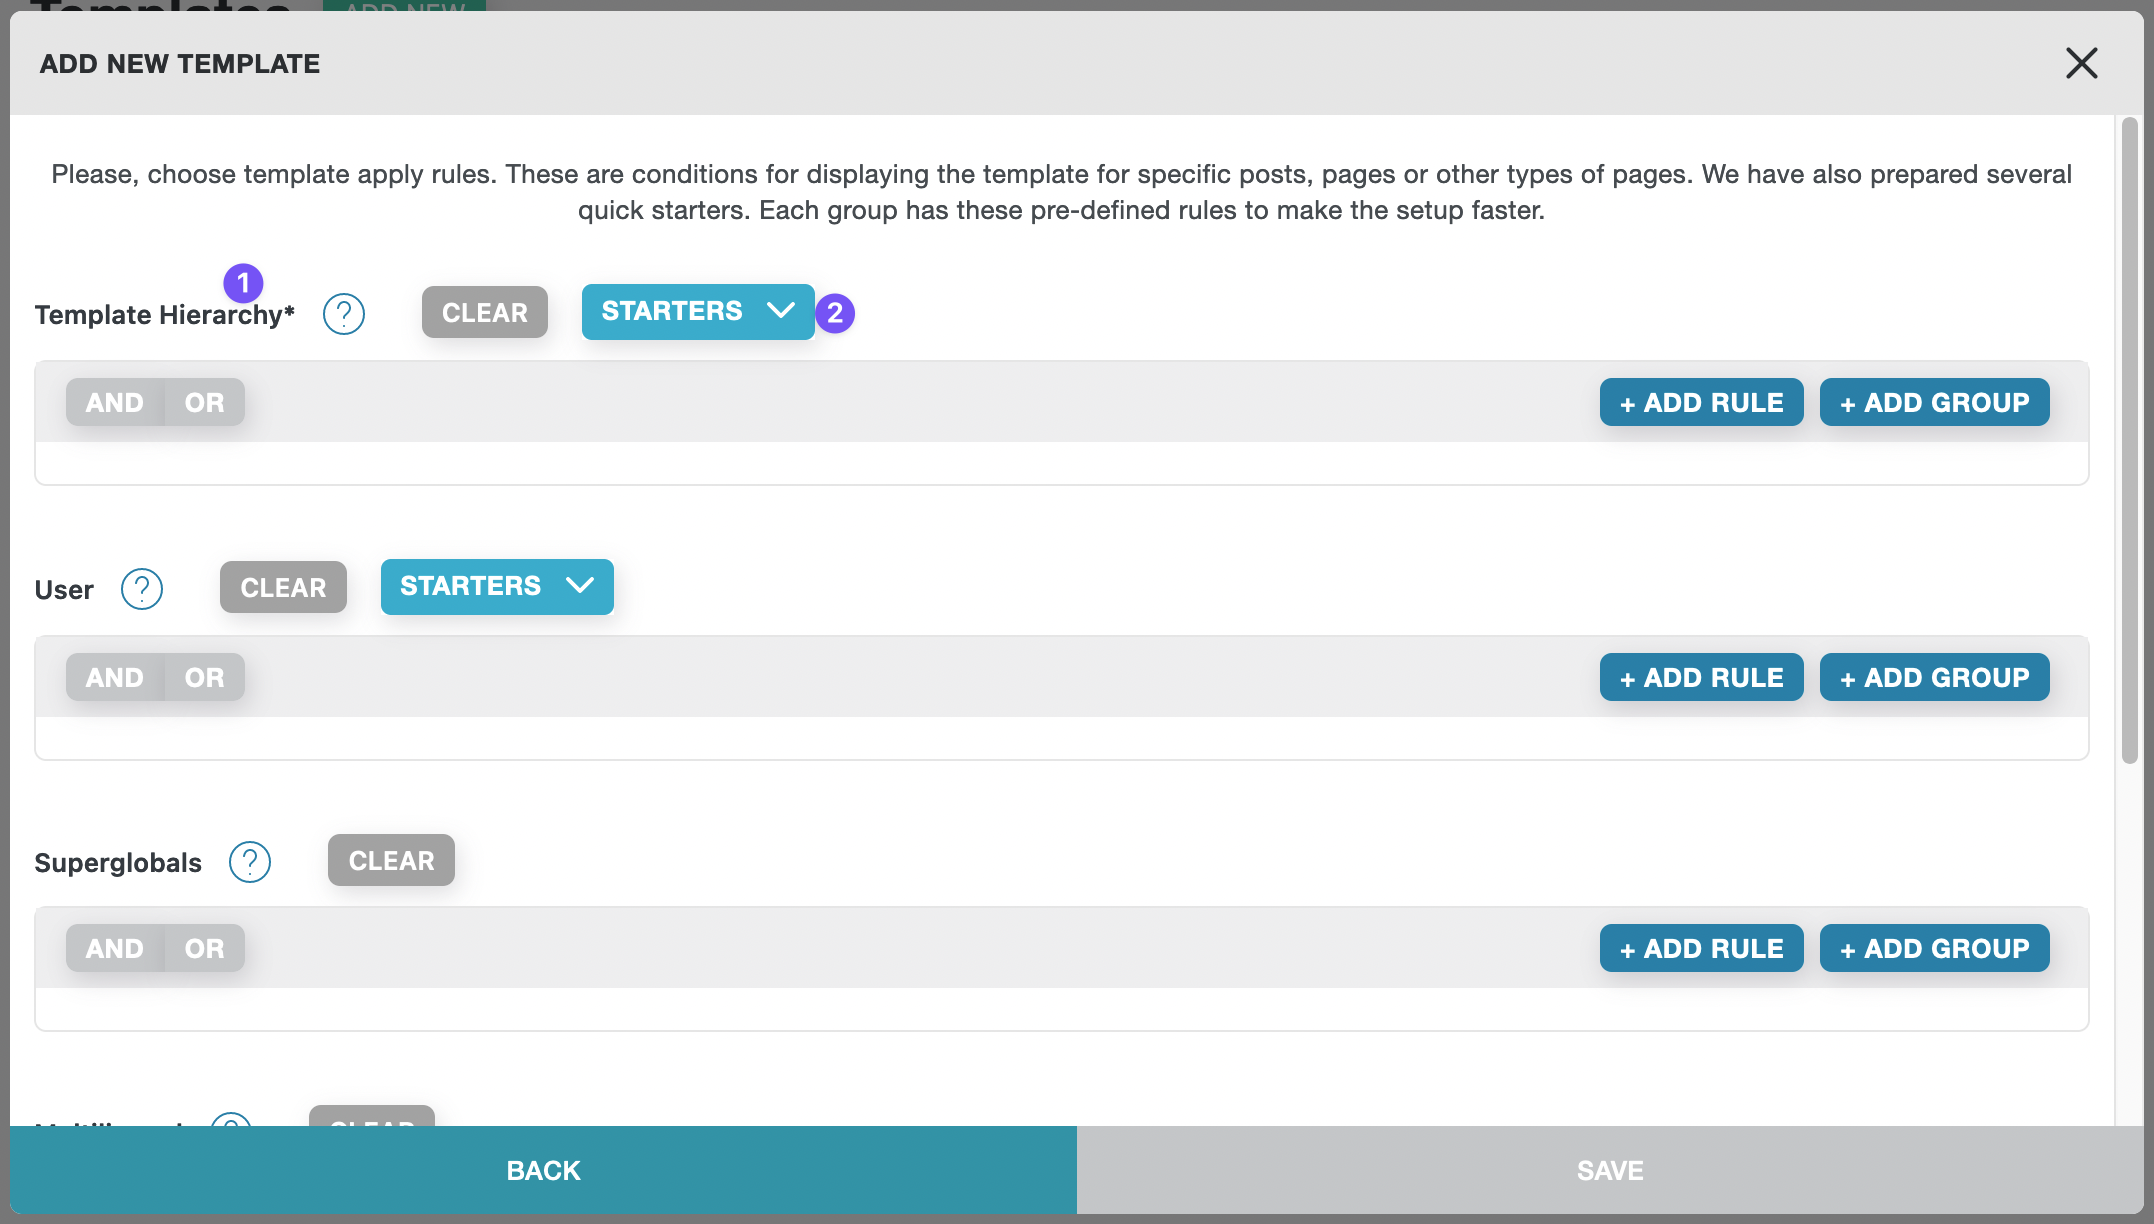
All apply rules are organized by groups. The first group - template hierarchy is a required to be filled in. Other group are optional. Many groups have starters for a fast and easy selection of apply rules.
- Template hierarchy group
- Starters dropdown
After the "Apply rules" are defined, click on "CREATE TEMPLATE" button.
Working with Apply Rules
Apply rules are essential for two things: displaying templates on proper pages and using dynamic data specific for certain pages (like post meta on post page etc)!
For a template to be visible on the site it has to be applied for certain pages. We do this by setting proper "apply rules" (according to our needs).

For this example we choose to apply the template to a specific page only. Save changes.
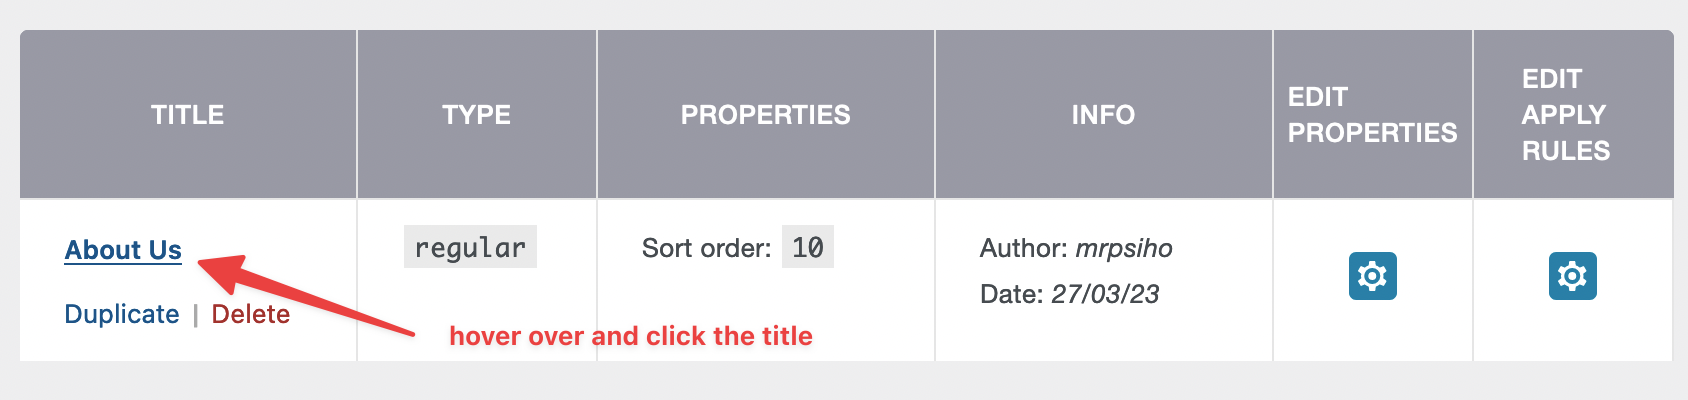
Now we are ready to proceed to the builder mode. We should hover over the row in the table of templates and click on "Edit template" button:
Editing template, working in the builder
Add modules/layouts
There are buttons + Module/+ Layout in the builder panel that opens a new panel page with modules/layouts that can be added to the page.
There are modules-containers, e.g. HTML Element, Form, which can host other modules. Hovering over the item in the Tree reveals additional management buttons:
+for adding modules/layouts as a child for the targeted modulehamburgericon gives access to actions: edit settings, duplicatetrash binicon gives access to action: delete the module
Edit modules
Hover over a Module's Tree item, then hover over the hamburger icon to open a small overlay with two links Settings and Duplicate. Click on the Settings link to enter the chosen module's settings tab of the Panel.
Alternatively, we can double-click on the module name to open the module's settings.
We can add children modules in two ways:
- by creating a new module inside module-container;
- by drag and drop operation, so existing module becomes children for module-container;
Nesting modules: method 1
- hover over a Module's Tree item, then hover over
+icon and choose what to add: module or layout; the click on either choice opens the panel page with all the things available of the selected type; - pick a particular item from the list and click on it;
The chosen module/layout will be added to the targeted module.
Nesting modules: method 2
- hover over a Module's Tree item, precisely hover over
vertical lineshandler and start dragging the item; - drag the item over another tree item: if it is a simple type of module, the sort operation will be performed (the overlay below the item will tip if the dragging module will be added before or after the targeted one); to move a module inside another parent, this parent must be opened in advance; hovering over an empty module-container reveals small overlay that says
move; - release the hovered module, and it will be moved;
Editing modules
Click on any module to start editing it. The panel will now show us all available settings of the selected module. The settings are organized into two tabs: Data settings and CSS settings.
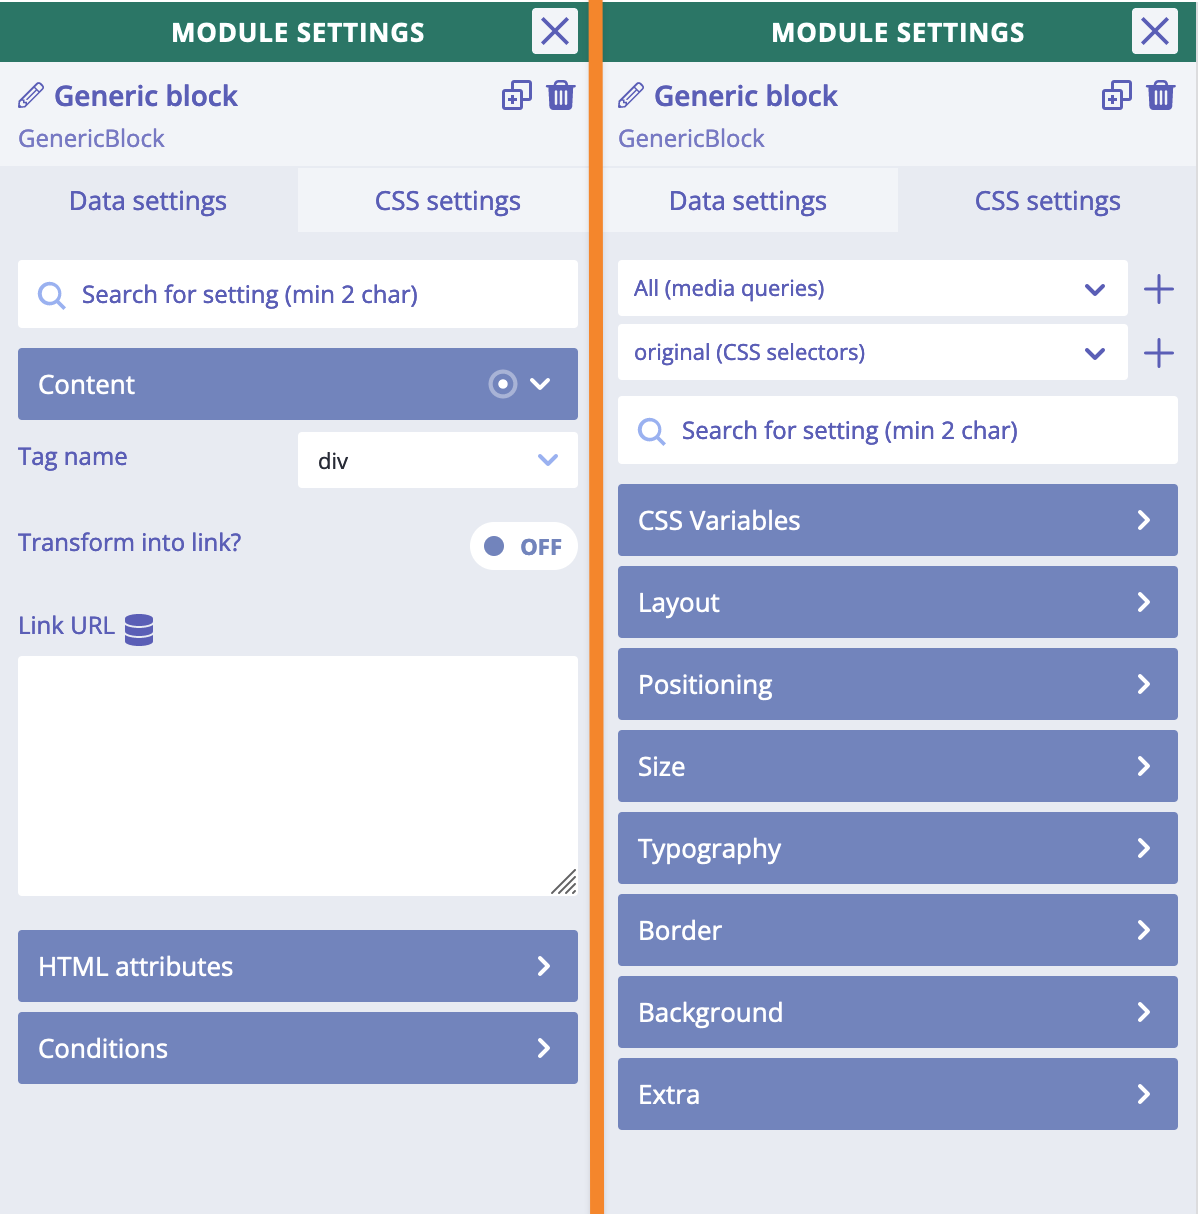
Modules are HTML tags. Usually they represent a specific HTML tag, without a possibility to choose. But some modules has "Tag name" settings where we can choose among available tags.
CSS settings generate CSS rules. By using this type of settings we can add styles and implement designs in the builder.
Save & Publish
Save
Builderius detects unsaved changes and will show us a prompt to help prevent data loss in case we reload the builder by accident. There is no autosave functionality in the builder.
To save our changes click the big "SAVE" button in the upper right corner of the builder panel. This button is GREEN when there are changes to save or this button is GREY if all the changes are already saved.
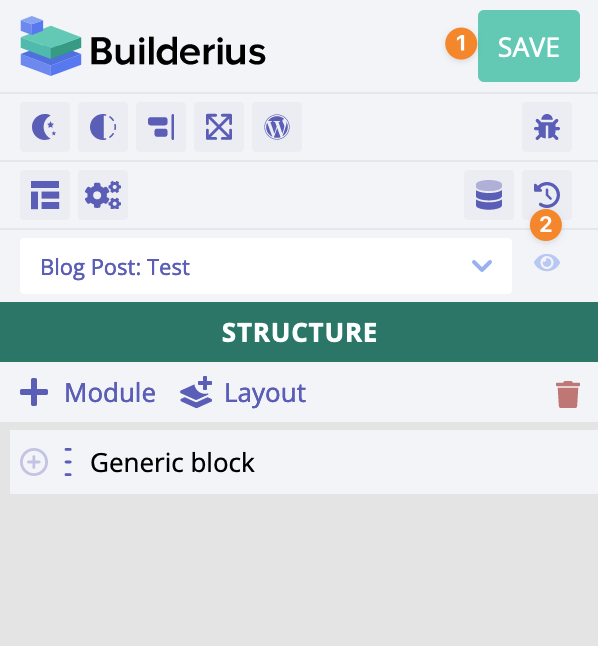
- "SAVE" button
- Revisions
A new revision will be created upon saving the changes. We can access all the revisions by clicking on the "Revisions" icon.
After the changes are saved, we can preview the result on the "front-end" - preview on the actual page. To do this click on the "eye" icon in the builder panel.
Builderius has a built-in staging environment and uses it automatically. It means that the saved changes will be visible for administrator only. Administrator can switch between development/production modes to preview the changes. The controls are located in the admin bar:
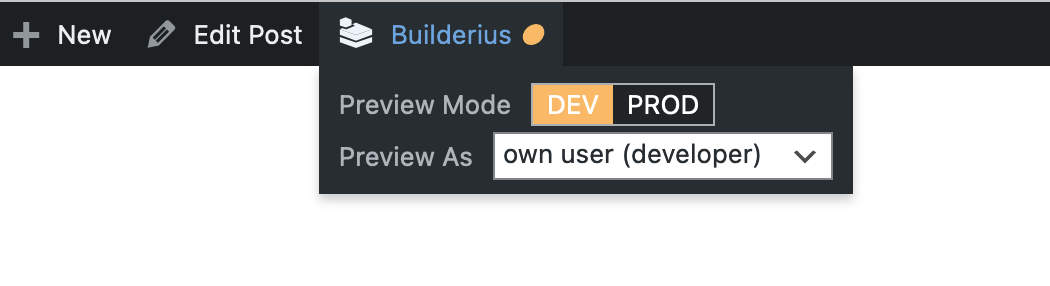
In the DEVELOPMENT mode administrator sees the current saved changes in the template.
Upon switching to the PRODUCTION mode the admin will see the currently published version of the template
(published within a release, that will be explained a bit later) OR the original WP theme if no releases were published yet.
Publish
Builderius uses a system of special entities called "releases". Release is a set of templates and global settings combined into one item that can be:
- published/unpublished any time;
- exported (as a ZIP archive along with the images used in the templates)
- imported
In order to publish our work done in Builderius we have to go to "Publish" admin page:
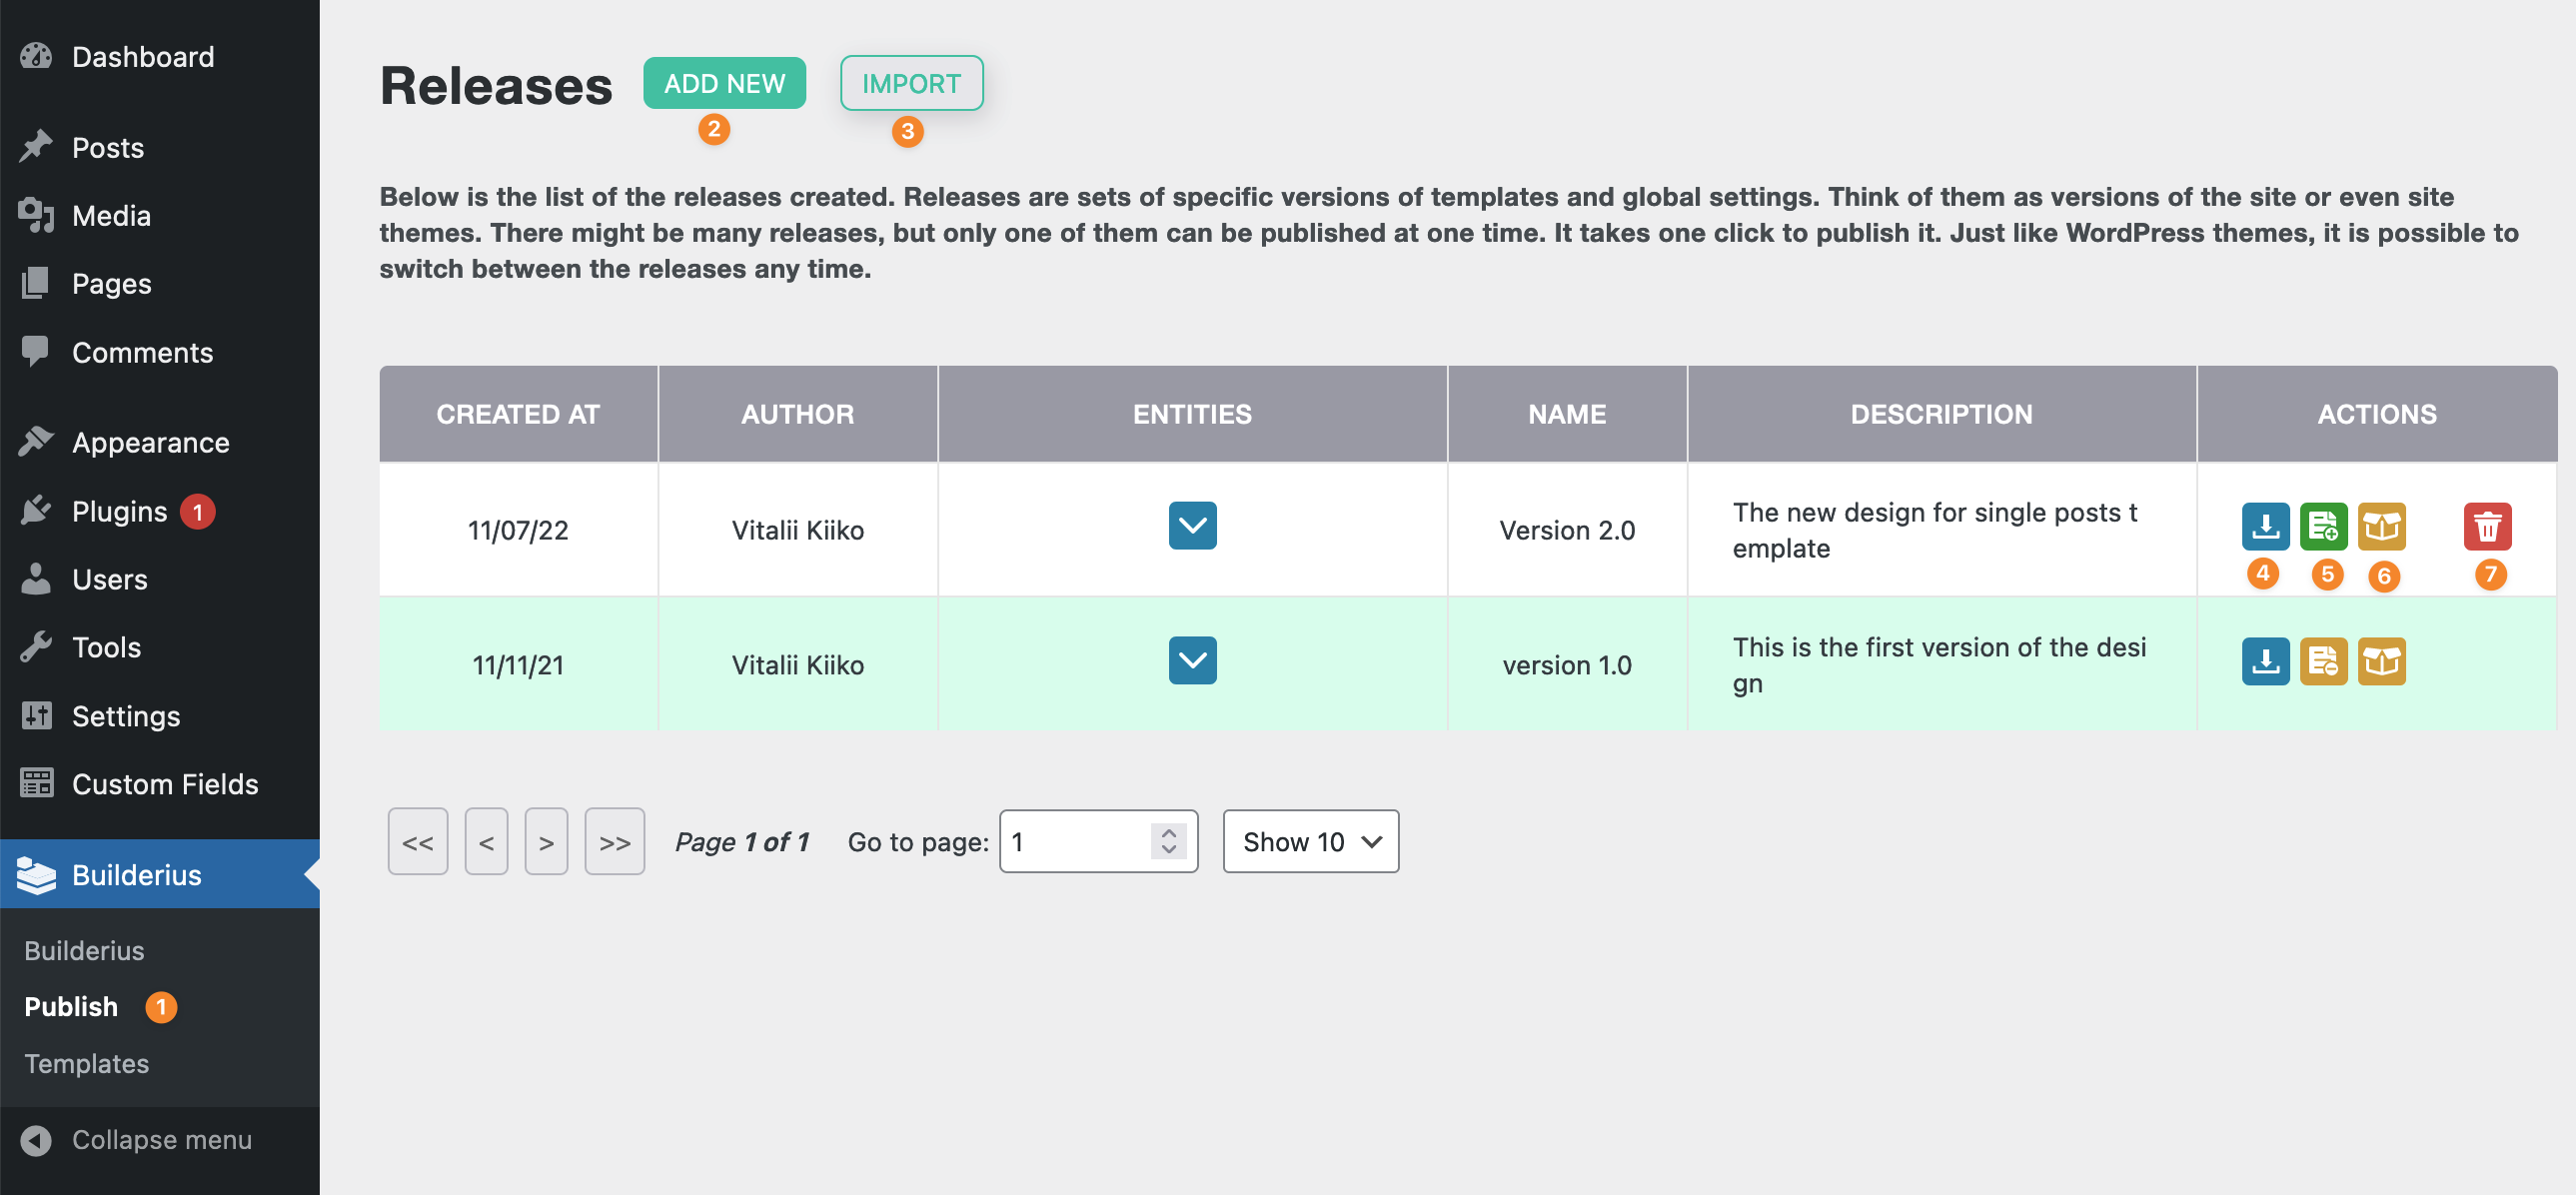
- "Publish" admin page with the table of releases
- Add new release button
- Import the release button
- Export the release
- Publish/unpublish the release
- Extract templates/global settings from the release
- Delete the release
Creating a release is an easy to use 4-steps form wizard. Upon creating the release we may publish it so regular visitors will see the templates created!