Adding Dynamic Content
This guide covers the practical steps for adding dynamic content to your Builderius templates using both built-in WordPress data and custom queries.
Dynamic Data Interface
Dynamic data interface exists on every element in Builderius. The interface is located in two key places:
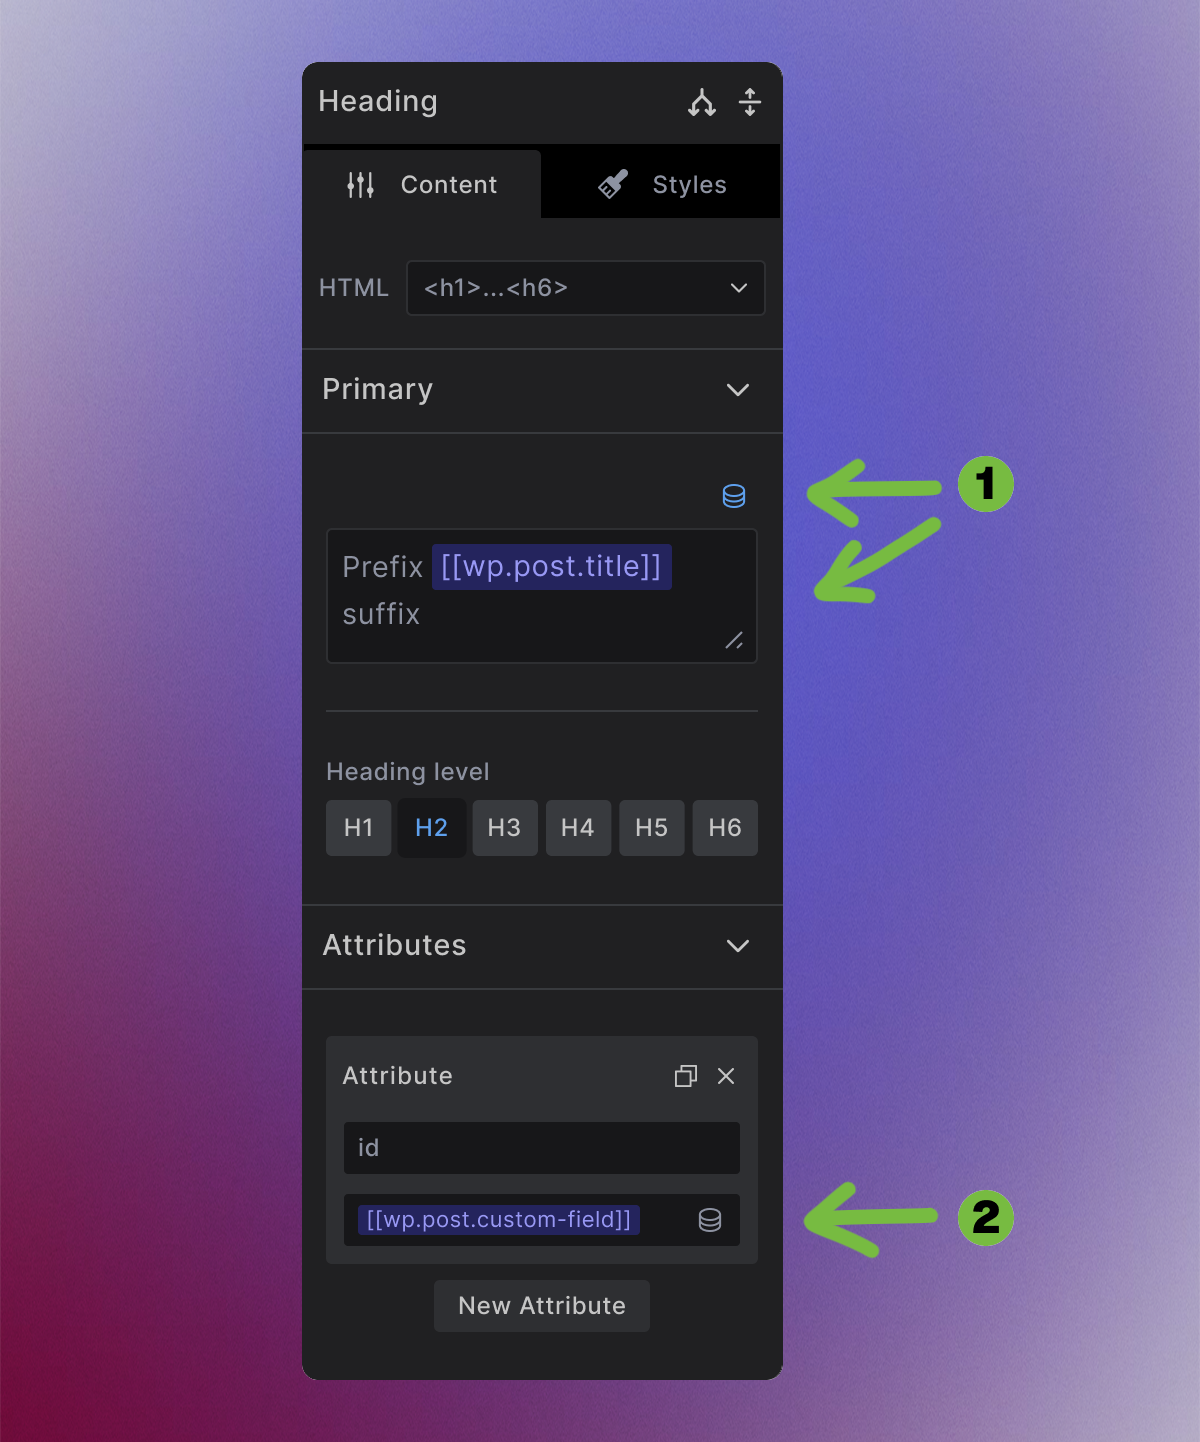
1. Content Areas - Replace or extend static text with dynamic content
- Click the dynamic data icon in content fields
- Browse available data sources or search by name
- Click to bind data - a dynamic data tag will be added
- Combine dynamic and static content within the same field
2. HTML Attributes - Make any attribute dynamic
- Click the dynamic data icon in attribute fields (id, class, src, alt, etc.)
- Bind data for dynamic IDs, classes, or other attributes
The Dynamic Data Modal
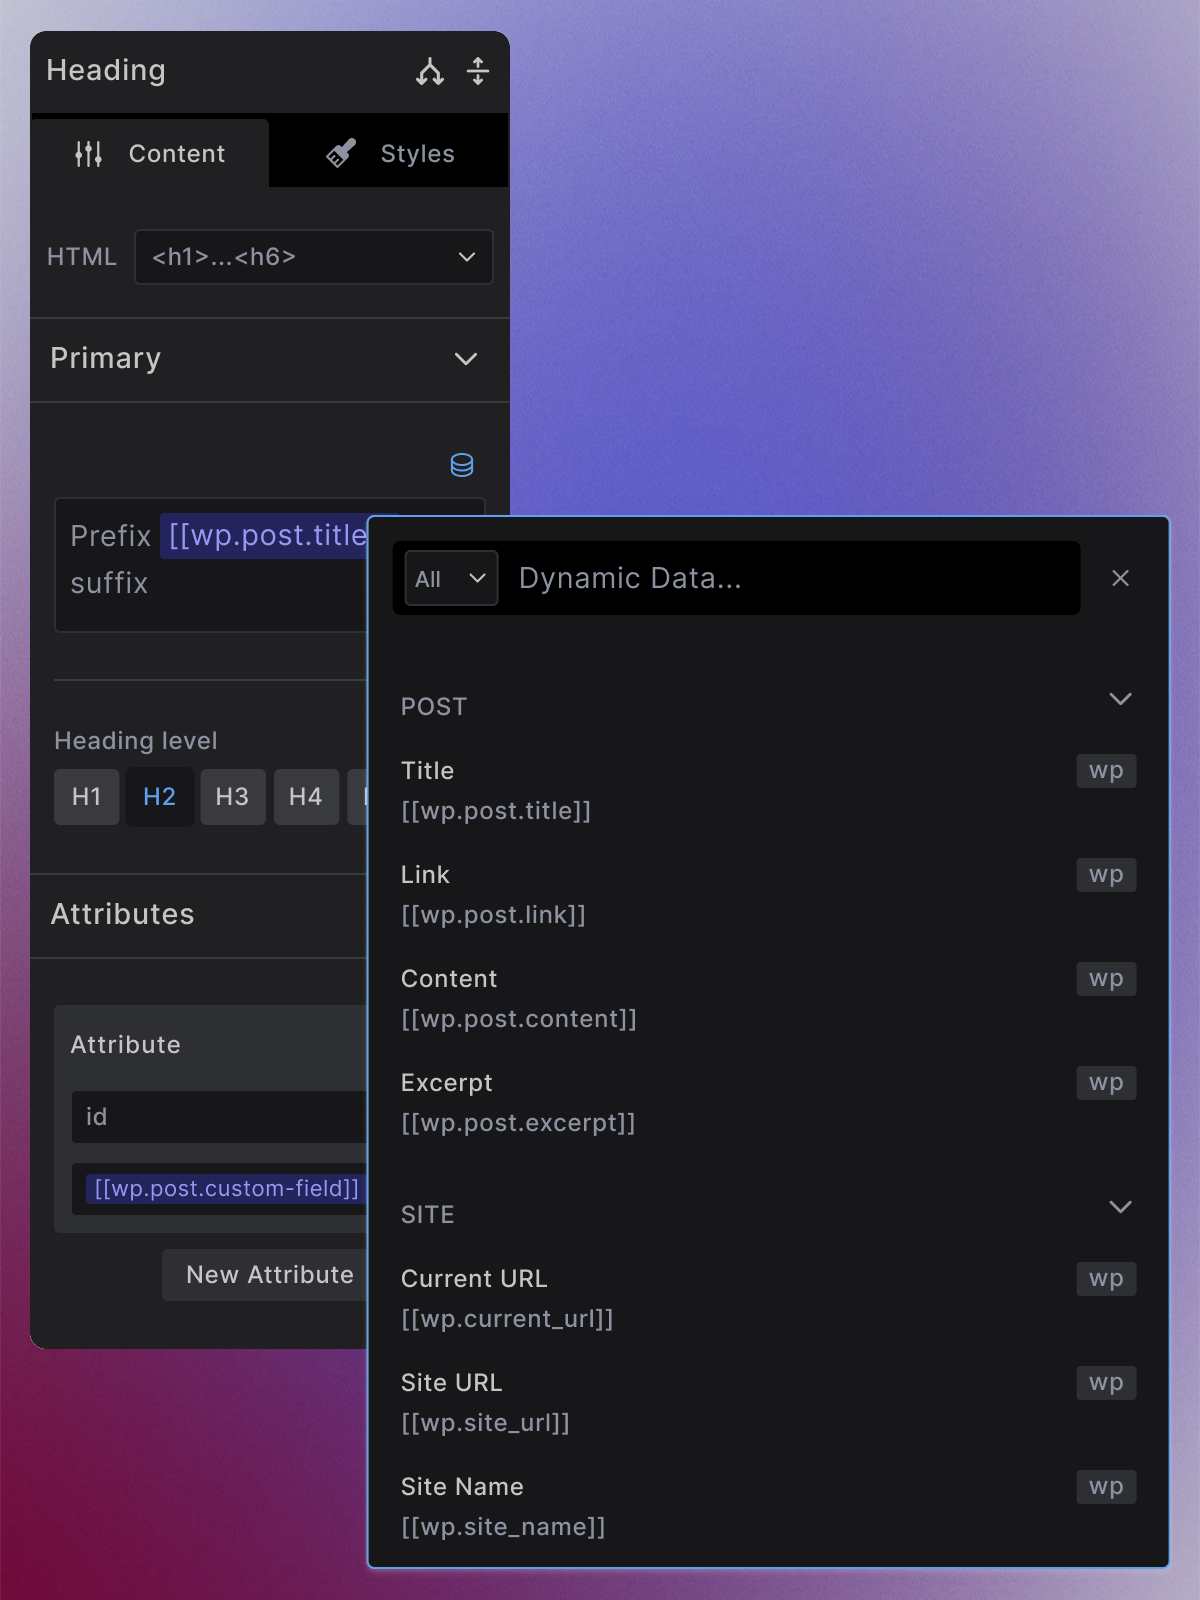
When you click any dynamic data icon, the modal provides:
- Search field: Quickly find specific data by typing
- Context filter (left side of search input): Narrow results by Post, Archive, Nav Menu, etc.
- Built-in sources: Labeled with WP - automatically available based on template context
- Custom queries: Your named queries appear with their variable names
Simply click any data source to bind it to your element.
Creating Dynamic Loops
For repeating content like post lists or team member grids, use the Collection element workflow:
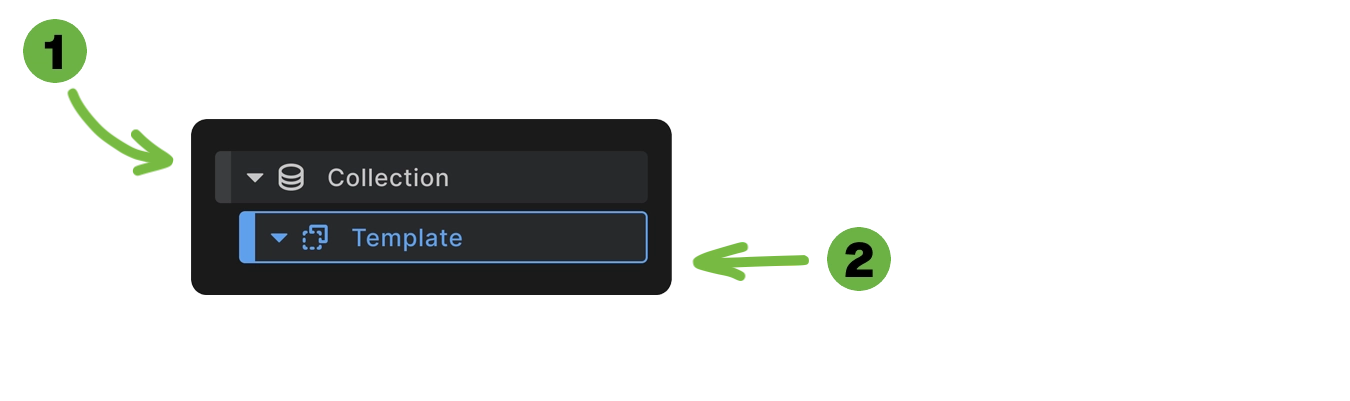
Step 1: Add Collection Element
Add a Collection element to your canvas. This automatically creates:
- Collection container - Wrapper with your chosen HTML tag
- Template element - Non-rendering container for repeating content
Step 2: Bind Collection to Data Source
Click the database icon above the data source field on the Collection element. The dynamic data modal opens showing only sources with repeating content.
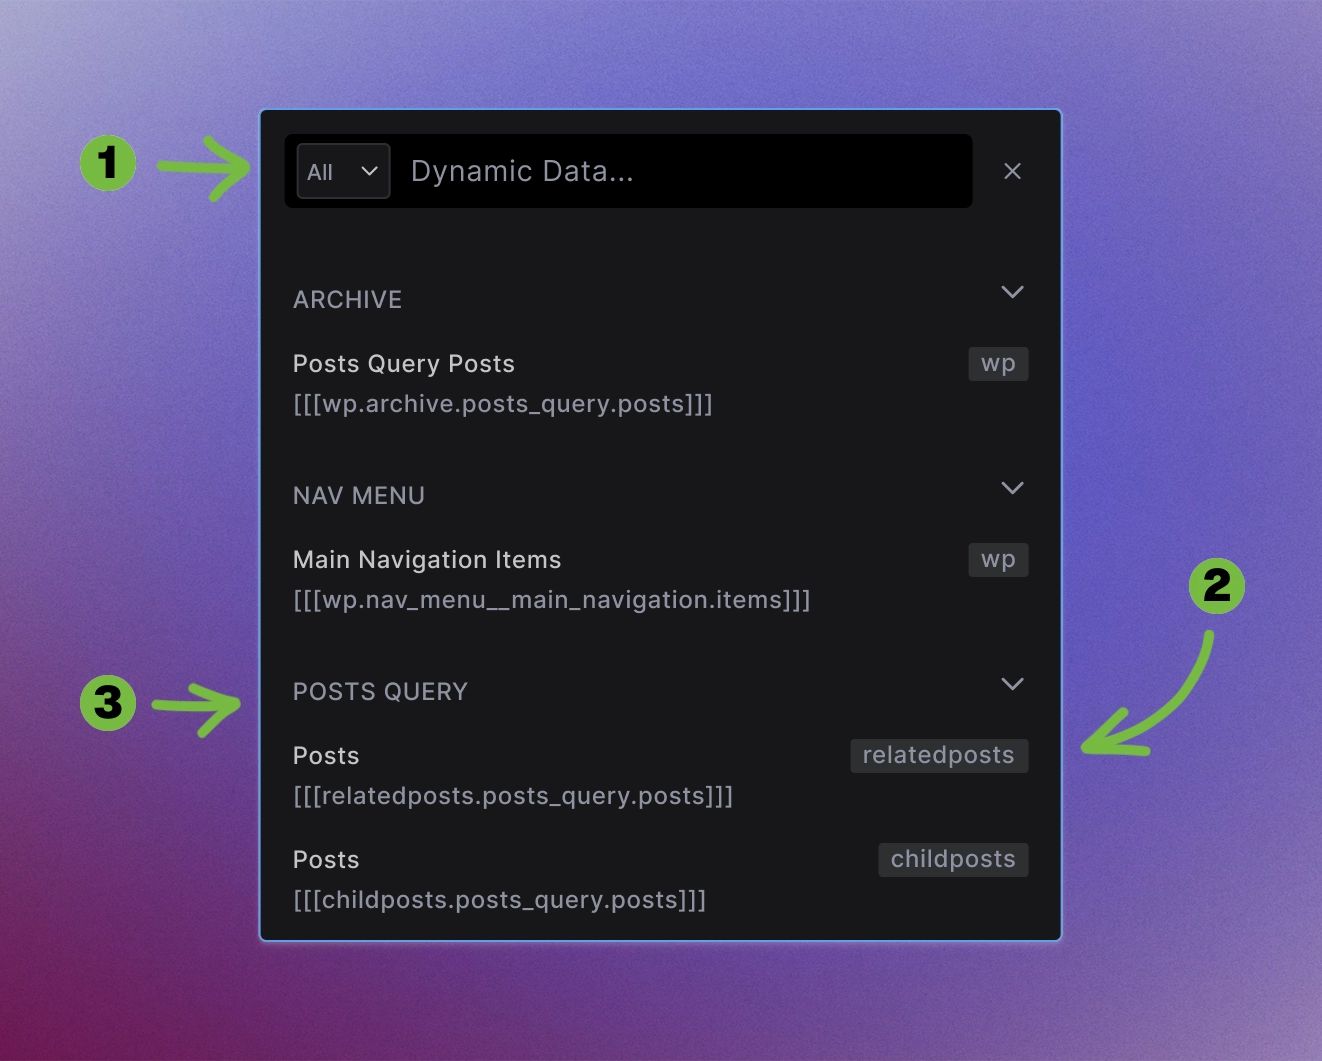
Choose your data source (e.g., archive posts, navigation items, custom query results).
Step 3: Add Content to Template
Add elements inside the Template element. These elements now have access to loop-specific data:
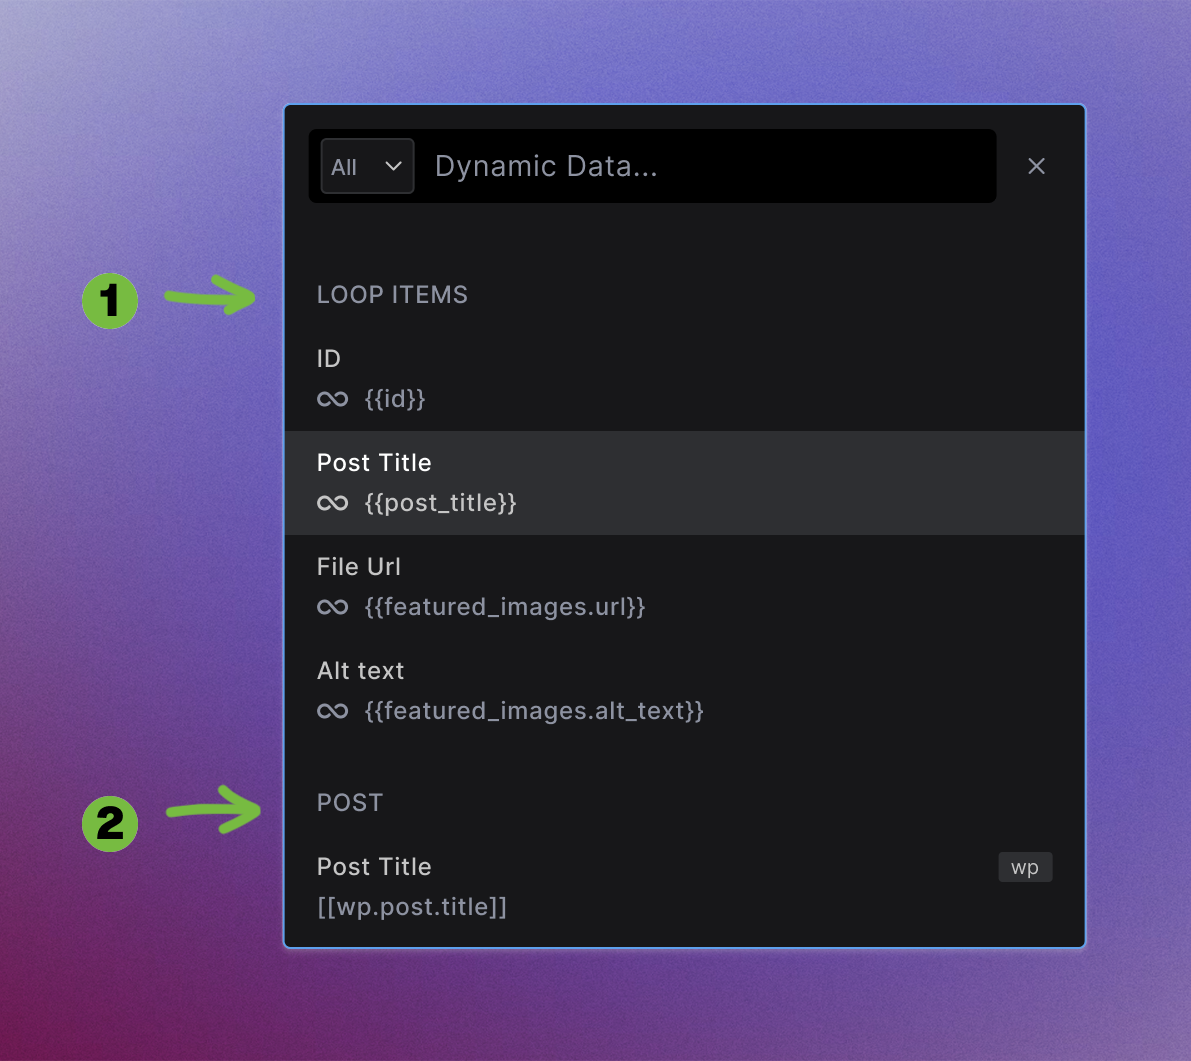
- Looping content sources - Select from this category for repeating content (produces
{{tag_name}}format) - Non-looping content - Other data sources still available if needed
Dynamic data uses bracket syntax ([[]] for non-loop data, {{}} for loop data). For complete syntax details, see GraphQL Syntax →
Working with Custom Data Sources
For advanced needs like filtered content or custom relationships Pro Feature
Step 1: Open GraphQL Editor
- Access from bottom toolbar: Dynamic Data tab
- Click "Variable +" to create new variable
- Give it a descriptive name
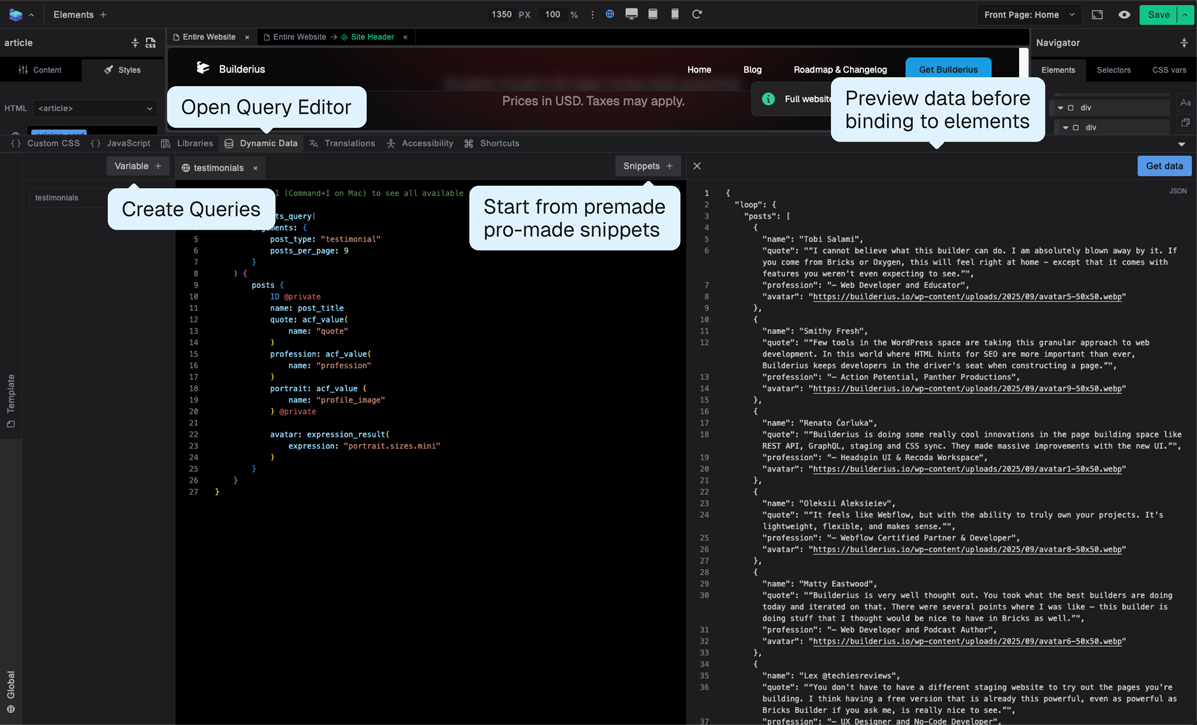
Step 2: Build Your Query
- Use snippets for faster start, or write GraphQL from start
- Use "Get Data" to test and preview results
- Verify the data structure matches your needs
Step 3: Bind Custom Data to Elements
- Your named variable appears in the dynamic data modal
- Bind to elements using standard workflow
- Use with Collection elements for custom loops
Workflow Best Practices
- Start Simple: Begin with built-in data like post titles and featured images before moving to custom queries.
- Test Regularly: Always preview your dynamic content to ensure it displays correctly.
- Name Clearly: Use descriptive names for custom queries so you can find them easily later.
- Organize Logically: Group related functionality in the same data variables when possible.
What's Next
Now that you understand the interface and workflow:
- Custom Queries → - Advanced data manipulation
- GraphQL Syntax → - Complete syntax reference
- Data Fields Reference → - Complete field documentation
- Collection Elements → - Detailed loop functionality