Export and Import
A release can travel. Export it from one site as a file, import it on another, and the second site gets the same templates, components and global settings. Use it to move work from a staging site to the real one, to reuse a design for a new client, or to keep a backup.
Exporting a Release
- Go to Builderius → Releases
- In the release's Actions, click Export Release
- Decide whether to include WordPress data
- Save the file to your computer

Including WordPress data
A release holds your templates and settings. Your pages, posts, menus and categories are WordPress content, and they are not part of it unless you add them.
Builderius asks: Would you like to include WordPress data (pages, posts, menus, categories) in this export?
- Choose the data to include from the list. Items a template needs are marked Required by template
- Or export without WordPress data, for the design only
If a template refers to an image that cannot be found, Builderius lists it before exporting. You can still go ahead; that image will be missing in the export.
Importing a Release
On the other site:
- Go to Builderius → Releases
- Click Import Release, next to Create Release
- Choose the exported file

The release appears in the list. From there you have two choices:
- Work on this release - load it into dev, to look at it and keep building. Production does not change
- Publish it - make it live on production
Before a release is loaded into dev, Builderius asks you to confirm:
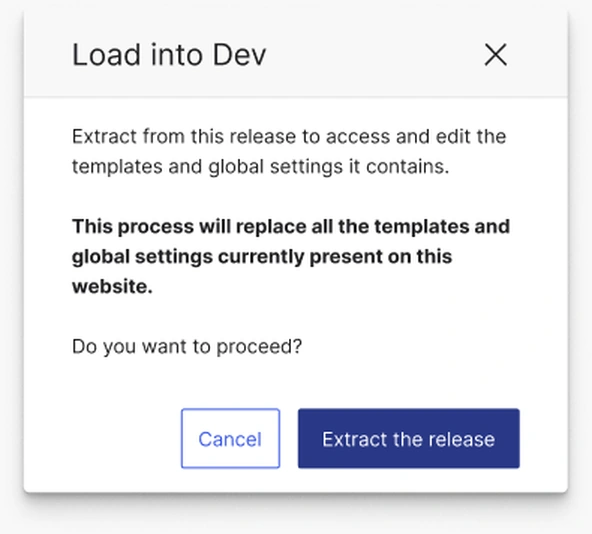
Work on this release replaces all templates and global settings currently on that site. Create a release of the site's current work first, so you can go back.
WordPress data on import
If the release carries WordPress data, you choose how much to bring in: all of it, required data only, or none.
You can also pick item by item. An item marked Exists — will be updated already has a match on this site, and importing updates it. Required items are always imported, so the pages built with Builderius work.
A Typical Move
- On the source site, create a release of the finished work
- Export it, with the WordPress data the design needs
- On the target site, create a release of what is there now, as a safety net
- Import the file
- Work on this release to check it on dev
- Publish when it looks right
Sync Between Sites
Syncing releases between sites is available in Builderius Studio only.
With Sync, connected Builderius sites send releases to each other directly, without a file in between. It is made for a permanent staging and production pair.
On every other plan, export and import does the same job by hand: export the release on one site and import it on the other, as described above.
A full guide to setting up Sync will be added to these docs.
Quick Starters Are Releases
The Quick Starters on the Builderius home page are releases too. Installing one imports and loads a ready-made release, which is why the same advice applies: save your current work as a release first.
Common Issues
- Images are missing on the new site: They were not found when exporting, or WordPress data was left out
- Pages or menus did not come along: Export again and include WordPress data
- The import cannot start: Another import, export or starter install may still be running. Wait for it to finish
- The new site looks unchanged: The release was imported but not loaded or published. Use Work on this release or publish it
Next steps: